Last week I had a “Pinterest Party” with two of my favorites…Tonya & Kelly. And don’t forget Baylor of course. My most favorite of them all. Sorry ladies.
It was Kelly’s idea to pick something off Pinterest that we wanted to DIY and then all get together and do the project. A fab idea in my opinion. I’ve tried numerous things I’ve seen on Pinterest, but I’ve never done it with a group of best friends. It was way more fun than the projects I’ve attempted alone.
We all three made a Christmas craft.
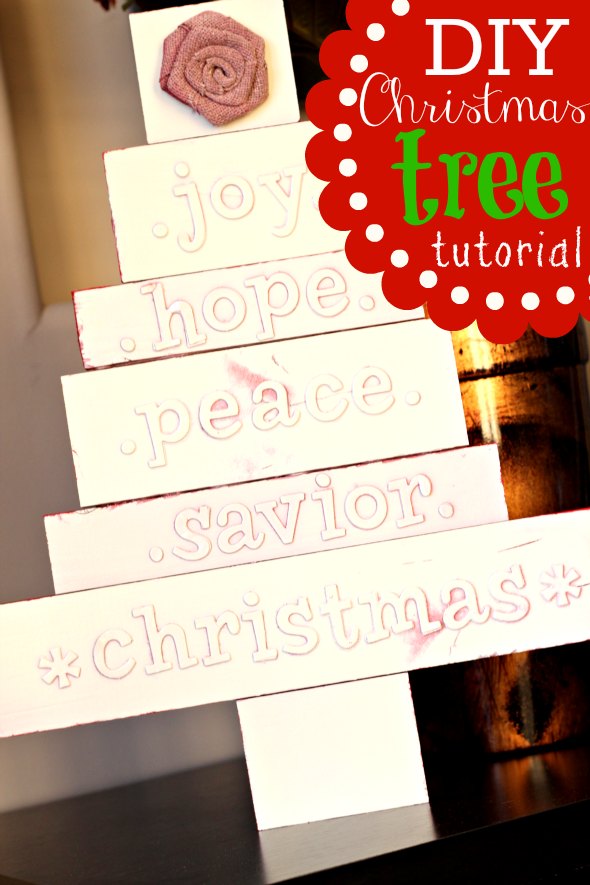
Kelly and I decided to do the same project and Tonya did something just a tad different. You can check out her super fabulous JOY Christmas wall art by heading over to her blog today.
A little back story on how our party started. First, let me just say this, EVERY single time Tonya and I plan to hang out something crazy happens. Well, this time was no different.
She called me in a panic from her minivan in the Lowes parking lot. Once I was sure she wasn’t getting hijacked or abducted I realized that she was trying to tell me that she spilled an entire can of paint in the floor board of her mini. She said the lid must have not been on it all the way and she reached down to pick up her phone that fell…and when she picked it up it was covered in paint. Along with the rest of just about everything else that happen to be on the floor of the car.

No words. No words. Oh Tonya, my love.
My first thought was…”That sucks….bad.” My second thought was…”How on earth do you get paint out of the floor board of your car?”
She showed up about 20 minutes later and we spent a good majority of our party trying to save the mini! Ha! It wouldn’t have been a night with Tonya without something like this going down though. I assure you. I’m kinda starting to worry she may stop making plans with me.
Ok, on to the DIY Christmas tree craft.
What You Will Need:
Thickers – thick stickers {Hobby Lobby – you may need 2 packages depending on what you spell} 1×2 board 1×3 board Spray paint Tree Topper Saw Hot glue gunI would say that this project took me about an hour minus the time it took for the paint to dry.
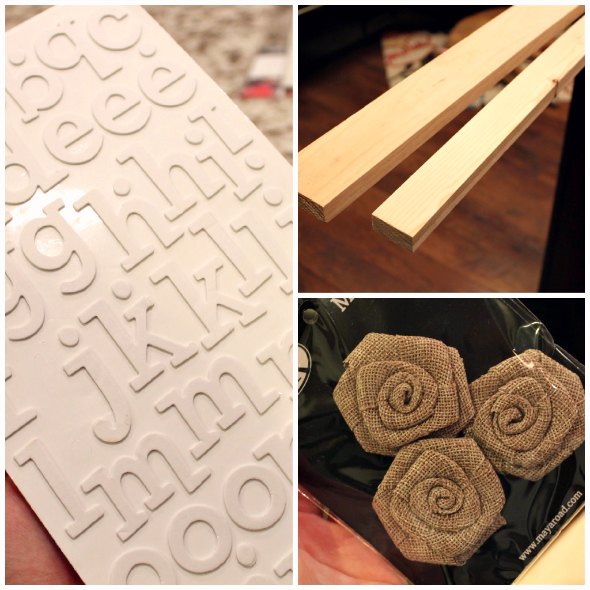
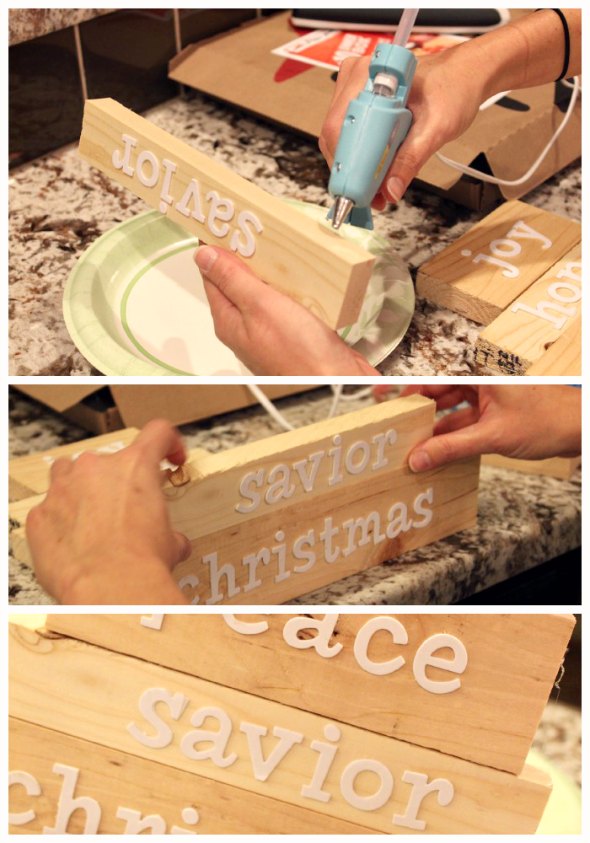
First – Place Stickers On Wood
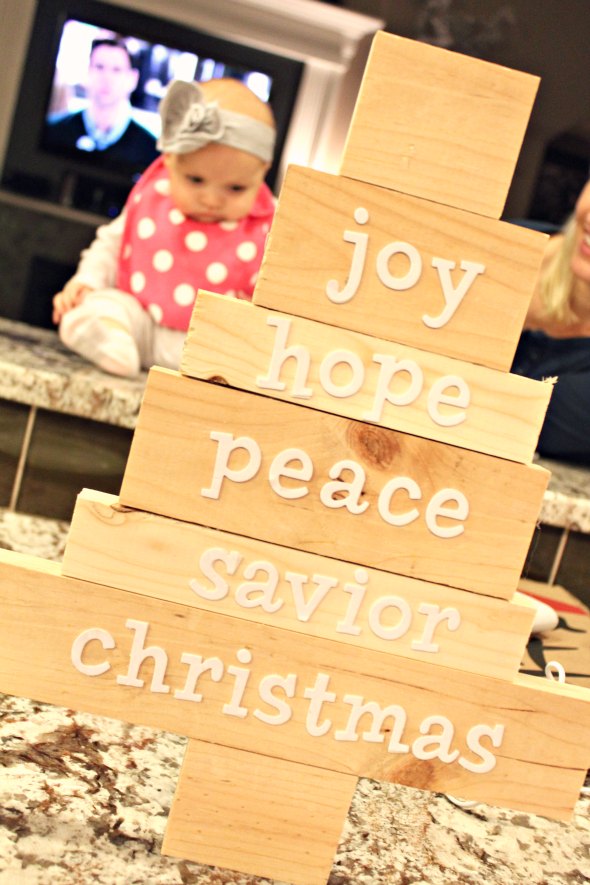
We spelled out Christmas on the bottom board, then savior {you could do believe}, peace, hope, and joy. The key is to make the bottom word the longest and then gradually get smaller as you go up.
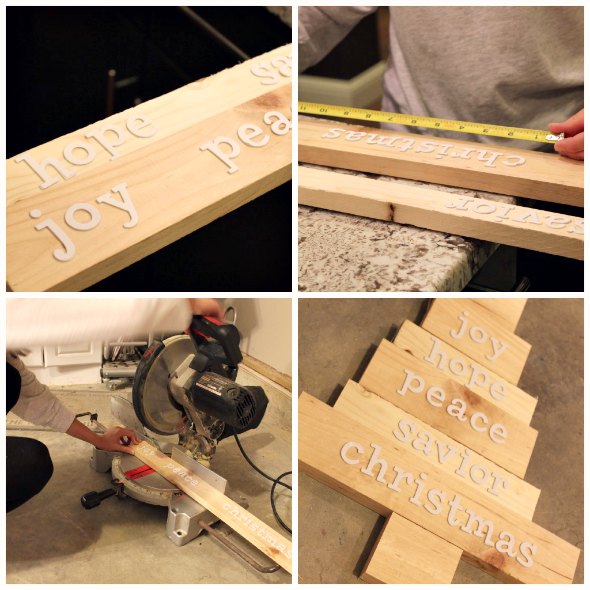
This was my first project where I used a saw! I can’t even tell you how official I felt after man-ing that saw.
If you’ve never used a saw this is a GREAT first project to try it out on. Just don’t cut your fingers off {I think my dad told me that 892 times}. I’m here to happily report all 10 fingers are still attached.
Also, we alternated wood size. We used the 1×3 on the bottom board and then a 1×2 and so forth. It’s not necessary, but I do like how it turned out.
Next Up – It’s Time To Cut
Cut your boards in between the words. Make sure you measure it out so that each side has the same amount of blank space. Also, cut a stem for your tree and a tree topper.
Bust Out The Hot Glue Gun
Take a hot glue gun and glue your wood pieces together.
Spray Paint Like A Fool
Y’all know how much I love spray paint. 😉 You can use any color you want, but lighter colors work best. I left the sticker covers on and just sprayed right over the stickers too.
I tried to spray it red at first, but hated it. So I went over it with cream. I decided to leave the edges red still. I like the contrast.
Top It With Something Fancy
I chose a rose for my topper. Shocker. I spray painted it red as well.
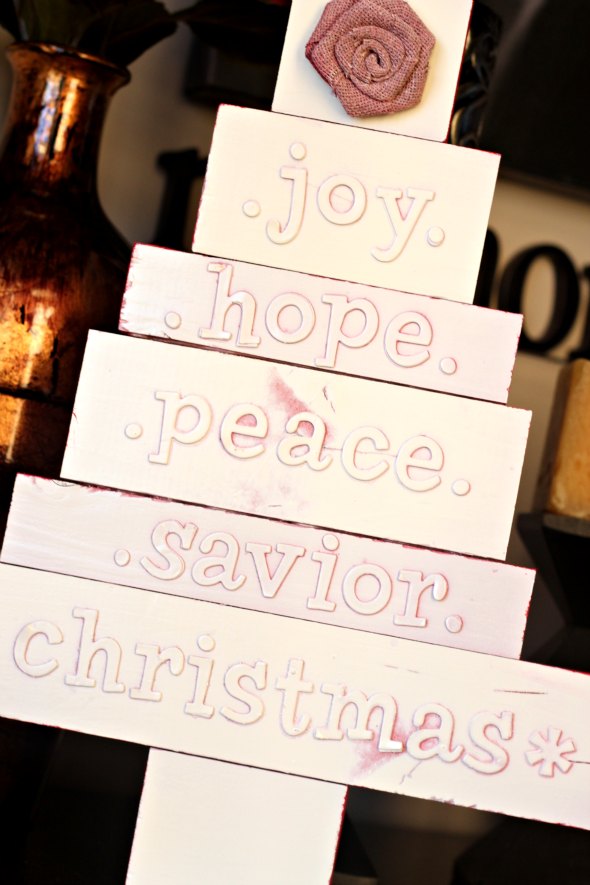
Voila – A Christmas Tree Is Made
That’s it!
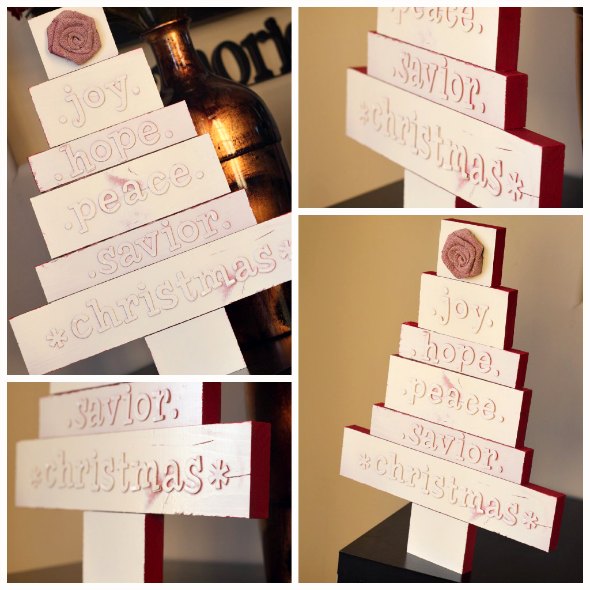

My first Pinterest party was a success. Have you attempted a Pinterest DIY Christmas craft?


Your girls’ Christmas trees turned out so cute!! I absolutely LOVED getting together with you girls & getting crafty! It was so much fun minus the minivan paint disaster!! I was wondering if you were going to include it in your post or not. I debated & decided it was such a large part of the party that I couldn’t NOT include it! I used the pic that Kelly took with her phone, but now I am stealing the pic from your post & inserting it! 🙂
Anyway…off to bed I go!! I have to be at work in less than 7 hours!!! GAH!
I made a refrigerator magnet Nativity set during a Pinterest party I went to recently. http://preparednotscared.blogspot.com/2011/12/nativity-play.html
It was easy and my little boy loves it!
I really love this… except I don’t have a circular saw… but, I guess I could have it cut at Lowes for me… hmmmph. So cute, though!
First of all, LOVE the tree. Pretty sure everyone on my Christmas list is getting this for their gift!! Second, did you just stick the stickers on? I’m afraid they might fall off, so I’m debating hot gluing them. Third, I had a neighbor who had paint spill in their van the same way. Lowe’s ended up paying to get it removed/cleaned. Last, where did you get the burlap flower? Polka Dot Posie? LOVE it! And thanks to you I ordered 3 of their rosette necklaces. Love it!
I just stuck them on and they stayed fine! I don’t think you need to glue them. I got the burlap rose at Hobby Lobby. So glad you love the Rosette necklaces from The PolkaDot Posie! I think I have every color too!! Good luck on making the tree! It’s super simple!
LOVE the creation—I have this pinned to create too, maybe I will actually get it done! We love Pinterest parties around here—one of my favorite nights and it forces you to get something done!
Julie
I made an ornament wreath from a Pintrest idea last weekend and it was so easy. I love it and can’t wait to hang it. I also made my initial frame that you sometimes see behind me in my stop and smell the roses videos from a Pinterest idea.
Hey Mandy! I met you at Team Vine last night! I love this christmas tree project, and would love it if you would share it at mine and Carrie’s blog hop! http://www.ablossominglife.com/2012/12/frugal-crafty-home-hop-2.html
P.S myself and a few friends do a christmas pinterest party at least once a year to make gifts for our friends!
Ah! Very cute idea! Thank you so much for sharing on our blog hop!! Amy speaks highly of you! Hope to meet someday:)
xoxo, Jordan.
Looks like you guys had a blast! Thanks for linking up to Frugal Crafty Home!!
Very cute! I saw this craft on someone else’s blog, but w/o the tutorial. Thanks!
I love this!! It turned out super awesome. I’d actually feel ok about using the saw after helping my husband build our deck a few years ago! Your right it’s really easy to use 🙂
I’d love to try hosting a Pinterest Party too!
Love it, I need to have a Pinterest party! I think that would help me get in the Christmas mood.