Hello House of Rose Readers! I’m Kelly from Smart School House.
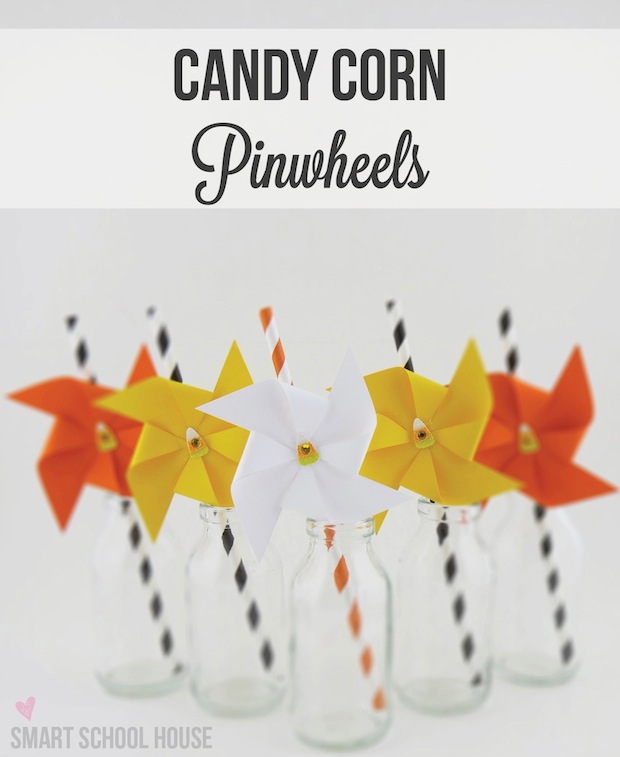
As always, I’m super excited to be here and today I’m sharing a tutorial on how to make Candy Corn Pinwheels!
With summer vacation over and most kiddos in school, I’m sure you have noticed that harvest and Halloween festivities have begun. Well, maybe we aren’t decorating our own houses with pumpkins and witches quite yet, but the stores certainly are!
And have ya been on Pinterest lately? It seems as though Halloween is in full swing over there (whisper voice: I love Pinterest….). So now is the perfect time to start thinking about the little parties and gifts that you might need to coordinate very soon.

These easy-to-make candy corn inspired pinwheels can be attached to paper straws for a party, they can be used as gift-wrap accents, or you can decorate your house with them.
If you have kiddos, they will be so excited to see you put these around your home. Or better yet, they will be so excited to help you make them!

Have you ever made your own pinwheels before?
They are really quite simple to do which is why your children might want to get involved with this cute crafty-craft.
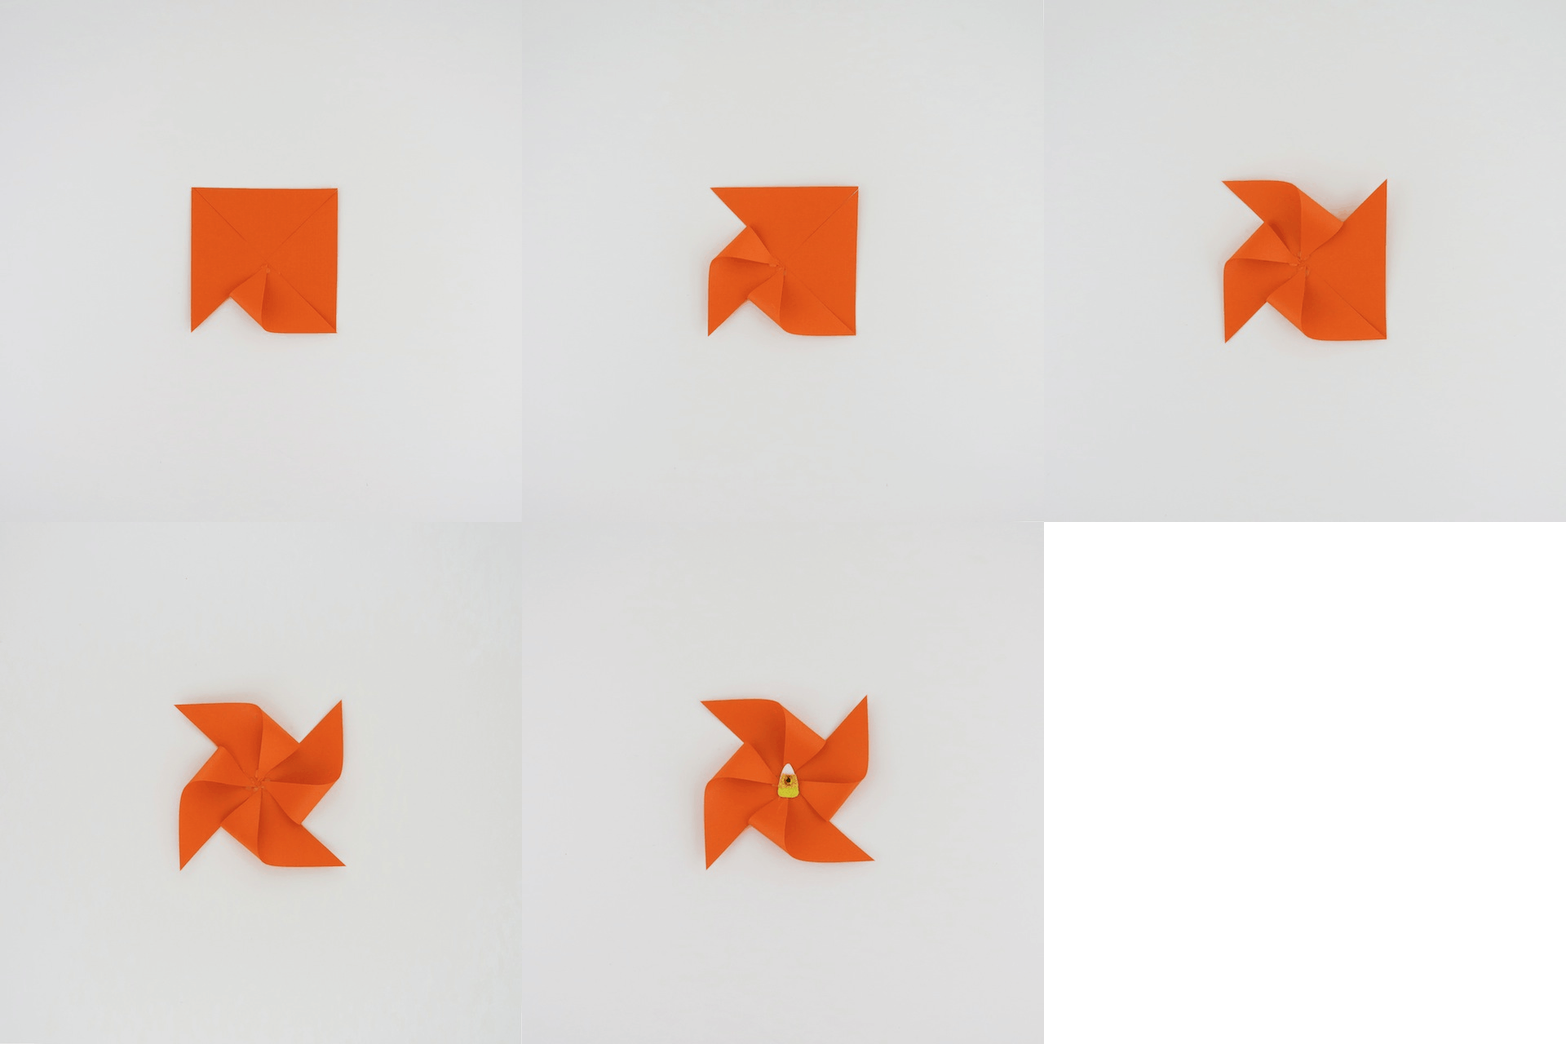
Check out how easy they are to assemble:

In order to make a pinwheel, you want to find paper that is somewhat sturdy because it allows the pinwheels to hold their shape more easily. Next, make squares with the paper. The size of the square can vary depending on what size pinwheels you want to make. For the Candy Corn Pinwheels that you see in my pictures, I used squares that were the exact size of a Post-it (meaning, I literally traced around a stack of Post-its!).To put it in perspective, a typical square Post-it is 3 inches by 3 inches in size.
Next, draw a light X across the square using a ruler. Be sure to draw a light line because you don’t want it to be visible when you are all done. After that, cut towards the center of the square following the lines that you just drew. BUT, don’t cut all the way into the center! You actually only need to cut about 3/4 of the way.
Using the visual below as guidance, bend every other corner into the center of the square, using a teeny tiny dab of hot glue each time.

As you can see, I placed a small candy corn embellishment in the center of each pinwheel. I purchased these from my local craft store in the scrapbooking section.
Now isn’t that just the simplest thing you’ve ever seen? Imagine the pinwheel crafting possibilities! Stand back and look at your amazing candy corn accomplishment!

Now I don’t want to get ahead of myself here, but really, you can use this same DIY tutorial for Thanksgiving, Christmas, or even birthdays and baby showers. If you can find large enough paper, you can even create huge pinwheels to decorate a child’s room (or a classroom like I did when I taught 1st grade!). Just keep in mind that these are decorative pinwheels…..meaning that they don’t actually spin:)
Happy Halloween House of Rose readers, and I’d love for you to visit me over at Smart School House to see what other kid friendly seasonal crafts I’m up to!
Thanks for having me Mandy, it’s always such a privilege to be here!


This is awesome! I work on an after-school-program for first-graders, and when the weather gets bad we stay inside more, which means we need more fun activities to do; and this could definitely be something we could make on a cold winter day! thanks for the great inspo!