I quit my full time job nearly 4 months ago to work for my husband. One of the things that my hubby needed help with immediately when I started…editing videos for his websites.
I remember opening up iMovie and staring blankly at the screen thinking, “Where the heck do I even begin???”
According to the husband, iMovie was suppose to be easy to use.
Psssst.
Easy once you know what you are doing. Not so easy if you have to figure it out on your own.
I think I complained about video editing for a good 2 weeks before I finally convinced him to sit down and give me a quick tutorial. Can I just say that the mere 20 minutes that he spent showing me the basics…were the best 20 minutes ever?!
Why? Because I spent hours trying to figure out how to add text to a video.
Hours people.
And don’t laugh. If you are some computer techie genius and you can pick up programs like iMovie like it’s your job…then good for you.
But, me? Me, not so much.
Me needed lots of help.
So now that I have been editing his videos for a few months and actually editing my own videos from my Stop and Smell the Roses vlog link up I feel like I am becoming a iMovie genius. Ok, maybe not a genius, but I definitely feel much more comfortable and timely about editing videos.
And I am here to say…iMovie truly is very easy to use once you learn it.
Here is a tutorial on some iMovie movie editing basics.
You know, in case you don’t want to waste hours of your life trying to figure it out on your own. Instead…spend 8 minutes and you can thank me later.
In this video I show you how to:
- Delete clips
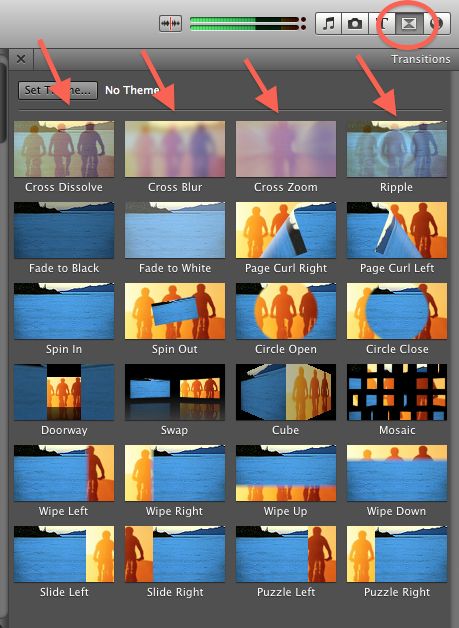
- Add transitions
- Add text
- Insert intro/exit slide
- Insert Pictures
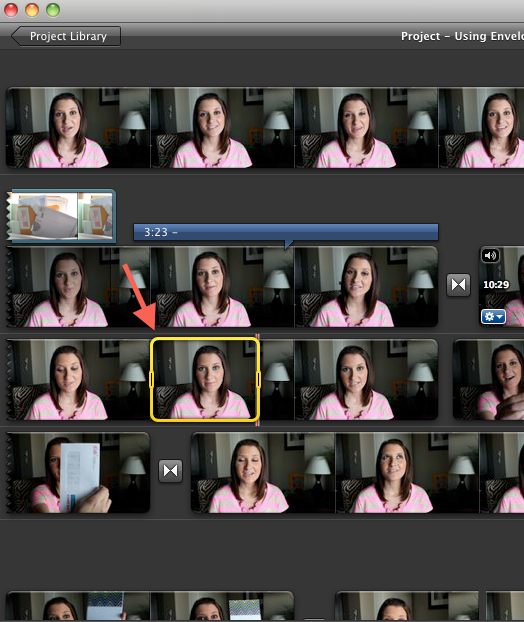
Delete clips: – Left click (and do not release) on the part of the video you are trying to delete. Drag your cursor to the right to capture the snippet of clip that will be eliminated. A yellow box will appear around the section that will be deleted. – Click ‘delete’ on your keypad. – See the yellow box below? This is the section of video that I deleted.
 Add Text:
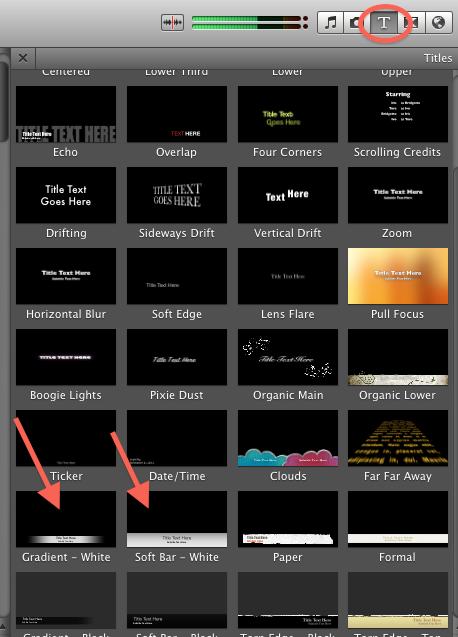
– Click on the ‘T’ (title browser).
– Choose any of the choices listed under title browser to add text to your video.
– Click on your choice of text and drag and drop it to the part of your video you want to add it to.
– I prefer to use ‘Gradient-White’ or ‘Soft bar-White’ when I add my name and url at the beginning of my video.


Hi Many, I want know if you needed to reformat the video before you uploaded them to Blogger? I tried one time but failed, I googled it says Blogger only accept MP4 format but not the format of Mov format of IMOVIE video…
Hi! Is IMovie solely for a mac? If so, what would I use because I do not have a mac.
iMovie is solely for a Mac. 🙁 Windows has Movie Maker (I hear it’s okay) our you can buy Camtasia or Screenflow. We also own Camstasia for screen sharing videos.